![]()
Plant Dreams, Grow Gardens
A Hoop House is actually a simple Greenhouse structure that is very popular among the Greenhouse enthusiasts. Hoop House makes a perfect DIY project to work on because it is easy to build and very cost-effective, unlike other glass or polycarbonate greenhouses. These greenhouses work great for extending the growing season by protecting your plants from cold and frost. You can use a Hoop House for growing your favorite veggies and herbs during winter and it also does a perfect job for growing your seedlings during early spring.
A Hoop House consisting of PVC or metal hoops that are anchored into the ground and plastic film (glazing material) is stretched over these hoops. The plastic film isolates your HoopHouse plants and veggies from outside environments and it will help you grow your own foods during winter.
Today we will guide you on how to build a hoop house (greenhouse) easily and effectively. We will try to provide as much information as we can, to help you build your own Hoop House from scratch. Fellows! this article is loaded with information so get your coffee and read it till the end. We are pretty sure by the end of this article you will have complete information and a clear idea of how you can build a DIY Hoop House.
Unlock the potential of your garden with GreenhousePlanter – explore our PRODUCTS today!
In this DIY Hoop House guide, we will build a polyethylene Hoop House with galvanized Steel Hoops and a wooden base frame. The following are the Necessary points that will lead you towards the completion of your Hoop House.
All of the necessary step for successfully building a HOOP HOUSE are concisely Mentioned above. We will discuss these steps in details below.
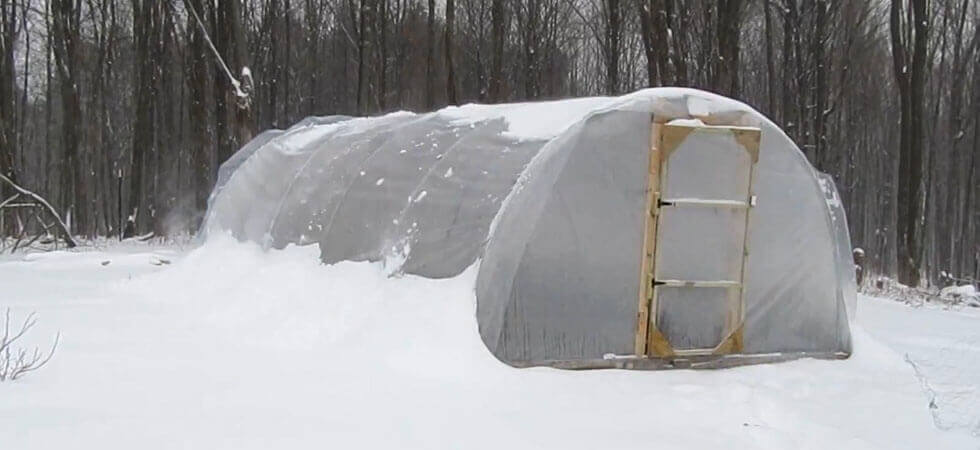
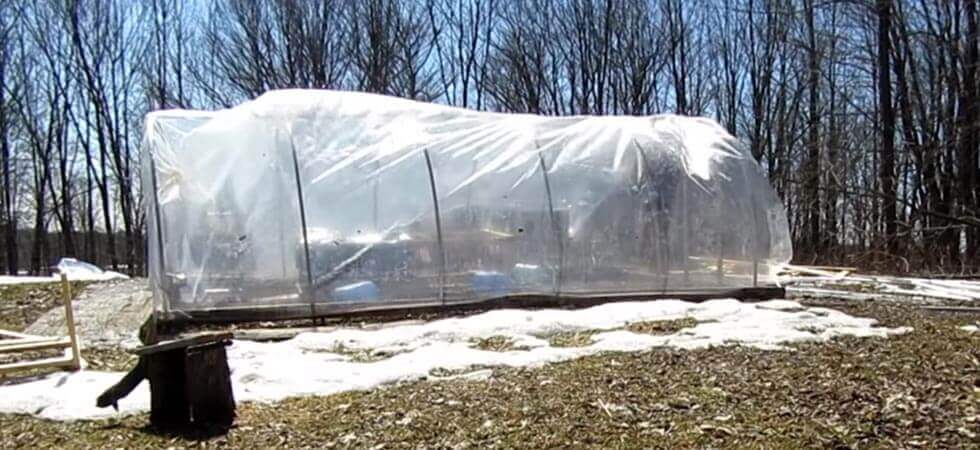
The Hoop House that we are building today is a passive solar design permanent Hoop House that will maintain the temperature inside because of the plastic insulation. During the day the sunlight will heat the hoop house while during night time the polyethylene insulation will keep the heat inside and make favorable conditions for the plants to grow when it’s cold outside.
We will go at a steady pace and we will discuss each and every construction step in detail. We will also provide some recommendations along the way which will help you make a perfect greenhouse.
We want to answer some of the frequently asked questions before getting into the details on how to build a hoop house. Here are some of the common questions that may come up in your mind.
Having a greenhouse is not important if don’t have a passion for gardening. But if you are in gardening then it becomes very important to have your own greenhouse. The following are the benefits of Having a Hoop House.
There are two main types of Hoop Houses i.e. permanent and movable Hoop Houses. The posts of the Permanent Hoop House are permanently anchored into the ground. For small and medium-size Hoop Houses a wooden base frame is usually used as a wall around the Hoop House and the poles (round hoops) are fixed to these walls. On the other hand, Movable greenhouse structures are designed in such a way so they can be easily moved by pushing them on rollers or wheels. For both types of structures, the shape of the hoop house can vary allot.
You must select the orientation of your Hoop House in such a way that the plants are exposed to the sunlight uniformly. To get a uniform sunlight exposure for the plants the length of the hoop house should be along the north and south axis. In simple words, if you are standing at the center of your Hoop House then one end of the tunnel should be towards the South Pole and the other end of the Hoop House should be towards the North Pole. In this way, there will be an equal distribution of sunlight when the grow beds run parallel along the length of the tunnel (along with the North and South Pole).
Wind and Sunlight are the two most important factors to consider when selecting a location for a Hoop House. A passive hoop house needs sunlight and wind for heating and cooling, respectively. Therefore, select a site that has maximum exposure to winds and sunlight. Open lands and fields are considered to be an ideal spot to build a Hoop House. Beside sunlight and wind, soil type and slope are also considerable factors for commercial large hoop tunnels but for a small hoop house changing the soil and leveling the ground is not a problem at all.
We will now give you information about how to choose the dimensions of your hoop house. We will also tell you about the floor plan and the layout of the greenhouse from the sides. It is important to have a complete design plan before you start to build a hoop house.
The width of this DIY Hoop House is 12 feet. This width is fixed because we have used a pole bender which is designed for building 12 feet wide hoop houses. If you want to build your Hoop House with the exact materials you should choose your greenhouse width to be 12 feet.
The poles (round hoops) should be spaced 3 to 4 feet apart from each other. If you are from a location where there are strong winds and heavy snowfall then 3 feet spacing between the poles would be a good choice because it will add more strength to the structure whereas, 4 feet is considered as the nominal spacing for a Hoop House.
The length of the DIY Hoop House can be chosen according to your requirements. Our designed hoop tunnel is 240 inches (20 feet) in length and we have spaced the hoops exactly 48 inches (4 feet) apart. There are a total of 6 hoops in our design. Each hoop is made by joining two poles so the total number of poles is 12.
The details of our hoop house are given in table 01.
Table 01: Hoop House Dimensions
| Feature | Details |
|---|---|
| Width | 12 feet |
| Height | 20 feet |
| No of Round Hoops | 6 feet |
| Number of poles | 12 feet |
Choose the length of your hoop house based on your requirements and available space. we highly recommend you to choose a length that is a multiple of hoop spacing distance (The minimum space between the hoops).
The following tables provide information on the number of poles required to build a Hoop House based on the selected length of the hoop tunnel. Table 02 provides information on the number of poles required when the spacing between the hoops is 4 feet. Whereas, Table 03 provides the information for Hoop spacing of 3 feet.
Table 02: Poles Required for 4 feet Hoop Spacing
| Length of Hoop House | No of Poles Required |
|---|---|
| 12 feet | 8 |
| 16 feet | 10 |
| 20 feet | 12 |
| 24 feet | 14 |
| 28 feet | 16 |
Table 03: Poles Required 3 feet Hoop Spacing
| length of Hoop House | No of Poles Required |
|---|---|
| 12 feet | 10 |
| 15 feet | 12 |
| 18 feet | 14 |
| 21 feet | 16 |
| 24 feet | 18 |
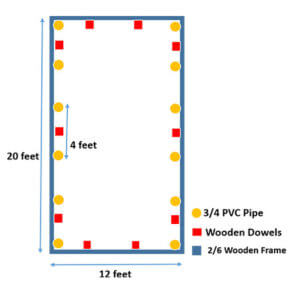
The figure below provides the floor plan layout of the hoop tunnel that we will build. The hoop house has a width of 12 feet and a length of 20 feet as mentioned in the following Figure.
The blue line shows the 2/6 wooden frame base wall which runs along the edge of the Hoop House. The orange circles are the position of the 1-1/2 PVC pipes they are used to hold the poles. The red square shows the position of the square wooden dowels (Nails).
We will discuss them in details. Note, The distance between the hoops is exactly 4 feet for our hoop house.
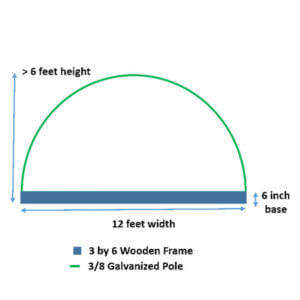
The Figure below shows the side layout of the Hoop House. The green arch represents the round hoop. For this design, the expected height of the greenhouse is above 6 feet at the center and the height of the wooden base wall is 6 inches.
For this DIY Hoop House Build all the details on the Materials that you must Buy are given in this second Article “12 by 20 feet DIY Hoop House Materials to buy”. The quantity and specification of the materials are for 12 feet high and 20 feet long Hoop House.
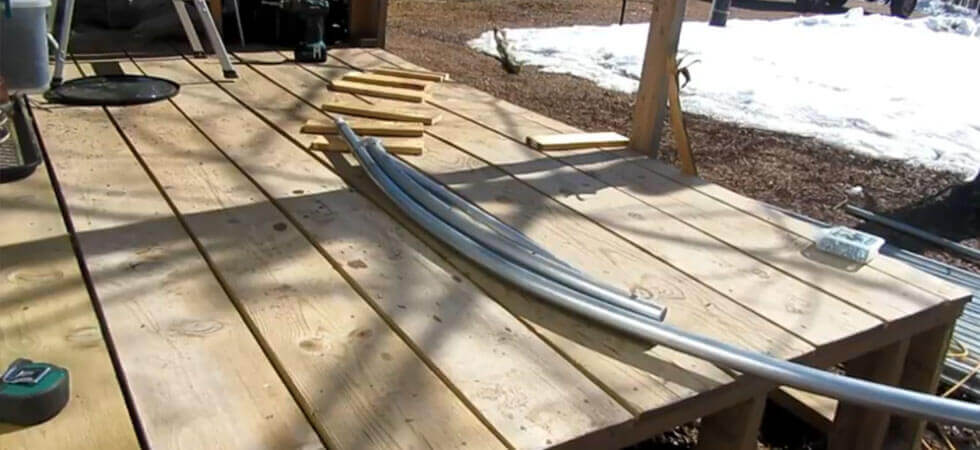
First of all, you will have to bend the poles that you buy because they come straight. You can bend the poles by using any pole bender or any other bending technique (check the poles, pole bender, and other materials required for this DIY Hoophouse).
In order to have a good looking and uniform structured greenhouse, it is better to use a specific pole bender designed for that particular width of the greenhouse. As this greenhouse is 12 feet wide so we have used pole bender specifically designed for 12 feet hoop houses. The details on this pole bender are provided in the DIY Hoop House Materials Article.
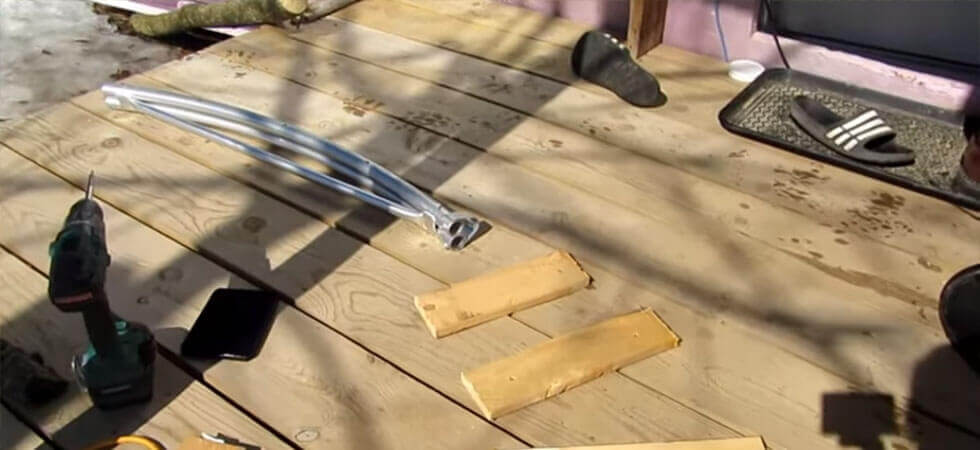
The 12 feet pole bender is shown in the Figure below. You can Fasten the bender on the floor or you can also mount it on a Table. The mounting surface should be perfectly horizontal for getting better results. The pole bender should be perfectly fixed and should not move when pressure is applied to it.
The center of the pole bender is slightly above the surface of the floor so we used small wooden slabs shown in the image below as a guide to hold the pole in a perfectly horizontal position. The height of the guide should be 0.5 inches.
The wooden guides are not important but it is recommended for best results. The grip end of the pole bender should be towards the wooden guides. This grip will support the pole while bending. The pressure will be applied to the other end of the pole.
On both ends of the Poles mark a 9 inches line. You can mark anywhere between 6 to 9 inches. do not bend the end of the poles after this mark.
However, it is not mandatory to leave the ends, you can also bend the entire pole. But we do not recommend bending the ends because we will insert these poles into the PVC pipes for supporting the poles. These PVC pipes will be anchored in the ground.
If the poles are straight at the end then it can easily be inserted in the PVC pipes. The other advantage of leaving the ends is that the male end of one pole can be easily inserted into the female end of the other pole at the center of the tunnel to make a perfect hoop.

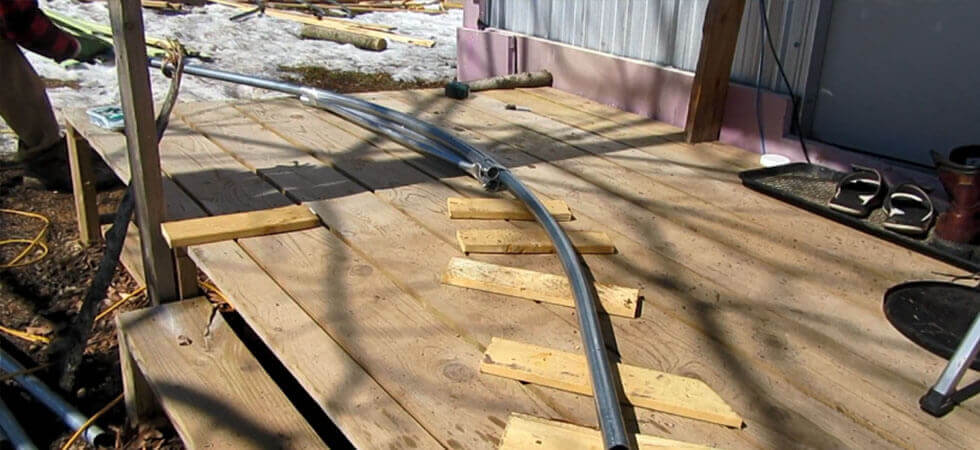
Insert the pole through the grip of the pole bender. Make sure to position the pole in the grip in such a way that a 9-inch pole is left on the other side of the grip as shown in the Figure below.
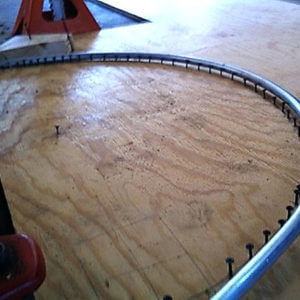
Bend the pole by applying steady pressure. You may wonder when to stop applying force? You can easily judge it by observing the end of the pole bender which is towards you. When you see that pole has touched the edge of the bender just stop there and don’t bend it further.
Now insert the opposite end of the pole into the pole bender’s grip and leave 9 inches from the other end. Bend it and push the pole further through the grip and bend it again. Continue this process until you have 9 inches of the pole left from your end.
One thing that you should note is that when you get close to the pole bender it will be hard to bend. You can just leave it there, take out the pole from the bender and bend it from the other end.
Finally, u will get a complete uniform round hoops. Bend all of the other poles using the exact same process.
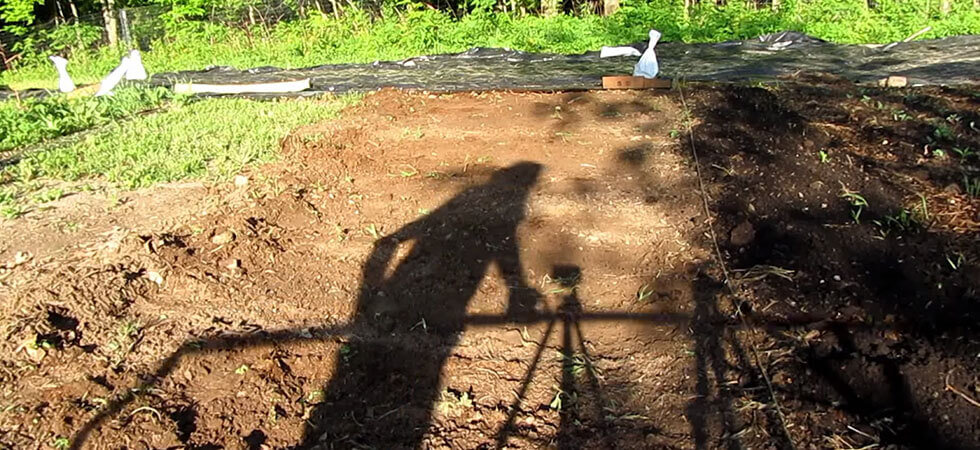
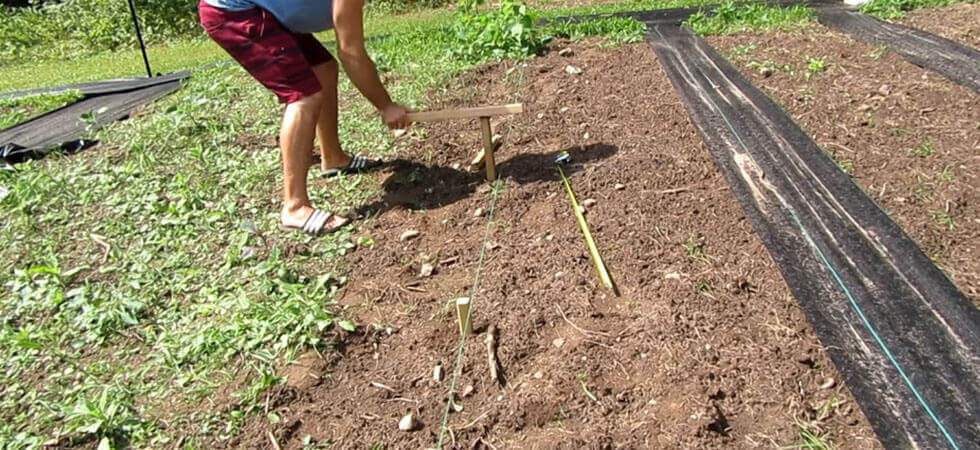
Anchor 4 dowels ( check the details and price of the wooden dowels in this Article) at the corner positions of your greenhouse and measure the distance along the two diagonals. In order to ensure that your greenhouse is a perfect rectangle, the two diagonal distances should be the same, if not then change the positions of the dowels accordingly.
After you have decided the length of your hoop house, Fasten a rope along the length as a guide for anchoring the wooden dowels in a straight line.
Then take wooden dowels (Wooden Nails) and hammer them into the ground. They will be used to support the wooden base wall frames. The wooden dowels should be perfectly aligned along the thread.
It is recommended to use a dowel of length greater than 1.5 feet because it would fix firmly in the ground. The dowels should be 6 inches above the ground so we can easily screw them to the wooden base wall.
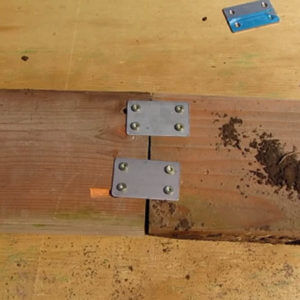
Use 2/6 or 3/6 wooden frames to cover the outer edge of the greenhouse. If the wooden frame is shorter in length use brackets to connect two pieces together as shown in the Figure. In case if you don’t have the brackets then screw a small 2/6 fame for joining the frames. If you want your tunnel base to be higher than 6 inches then you can use a wooden frame of height greater than 6 inches.
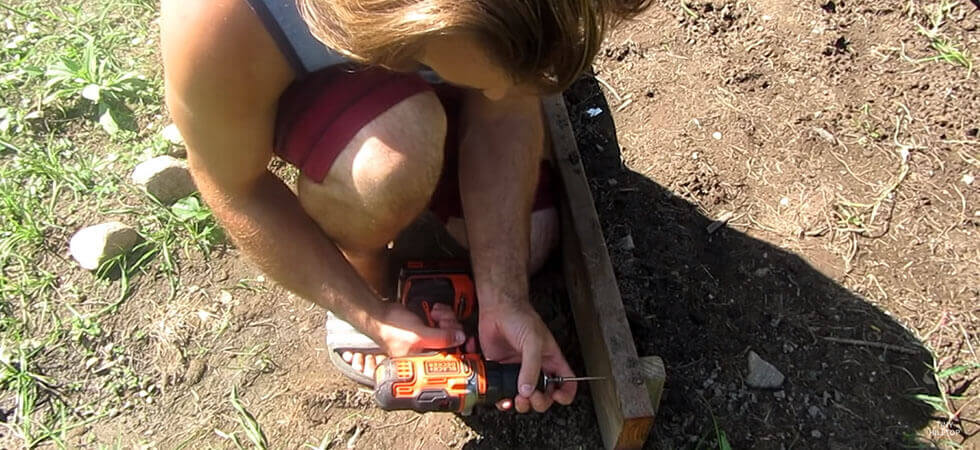
Screw the 2/6 wooden frame to the dowels. Make sure that you fix the frame towards the outer end of the dowels because it makes it easier to fix the plastic on to the frame and it also prevents the plastic from damaging by providing a smooth outer end.
In our design, we have just left a 2-inch space at the corner as shown in the Figure given below. This space is left to connect the other 2/6 base frame which will be along the width of the hoop house.
We suggest keeping more space between the corner of the frame and the dowel because the hoop pole would be fastened here at the corners.
In this build, we have used 2 inch PVC pipes for holding the poles but its internal diameter is a bit too large and it is not a close fit as the poles are 1-3/8 inch in diameter. However, It will fit tightly into a 1-1/2 inch PVC pipe which would be perfect for this task.
We recommend you to use 1-1/2 inch PVC. The length of the PVC pipe should be 18 inches. Anchor the PVC pipe 12-inches inside the ground, so it’s top-end it will be 6 inches and will level with the top of the wooden frame.
We used PVC pipes in our old build (The hoop house was then rebuilt). In this build, we used iron rods that are anchored in the ground. The top end of the rebars are inserted into the holes of the poles and it will anchor the poles but you can also use the PVC pipes for this task.
It’s up to your choice which method you prefer. One advantage of using PVC is that you can screw the PVC to the wooden frame which will make it stronger and will protect from harsh winds.

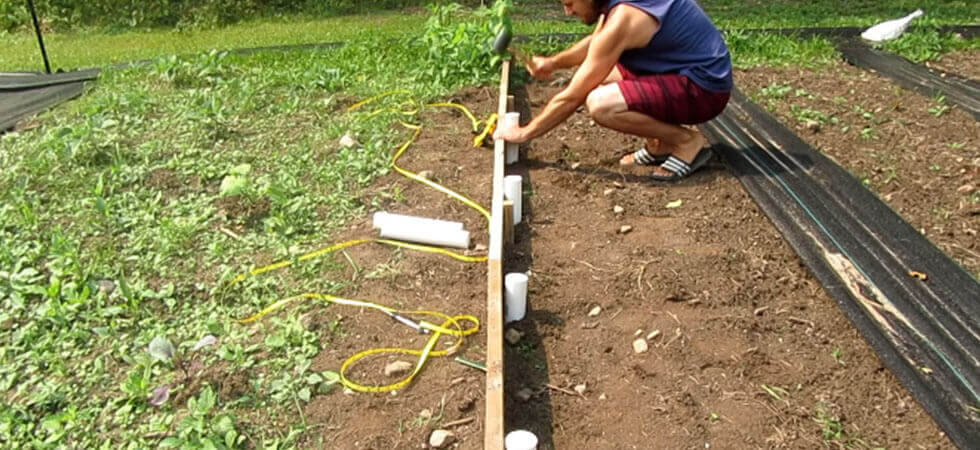
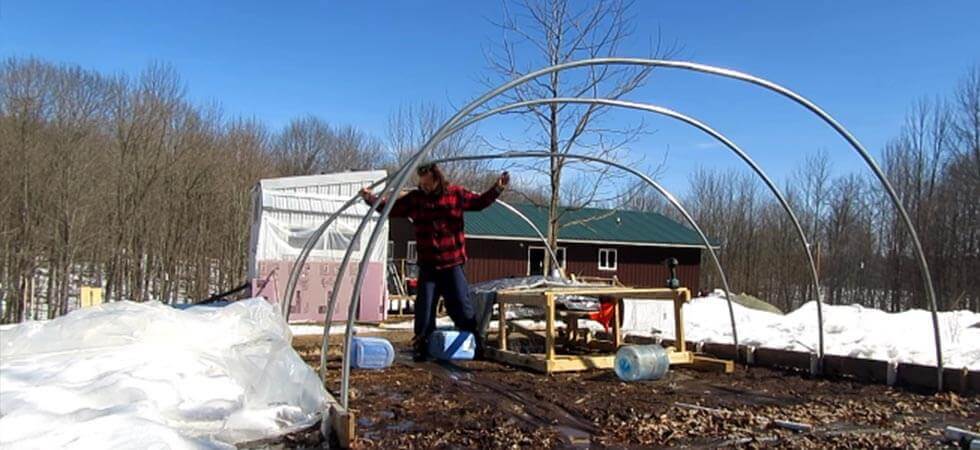
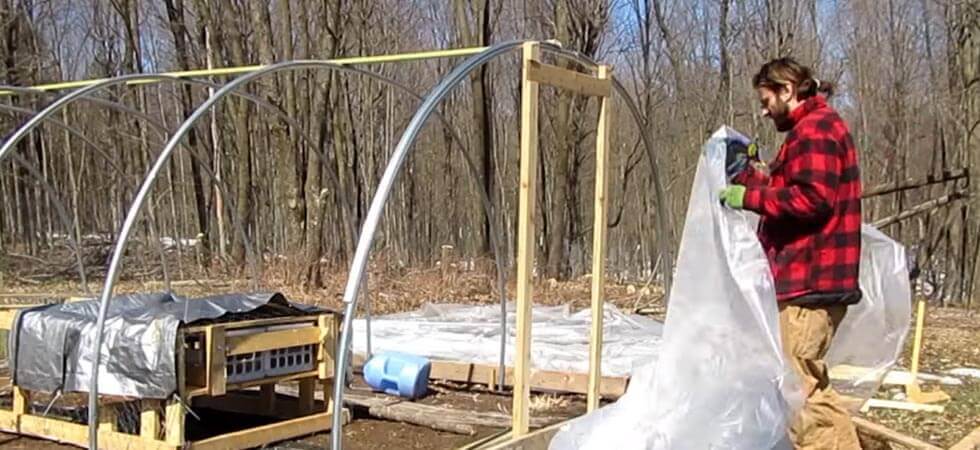
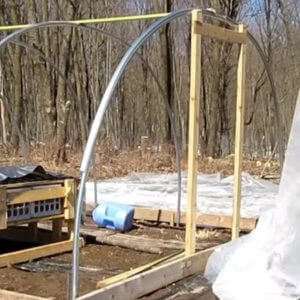
Insert the curved poles inside a 1-1/2 inch PVC pipe. One side of the poles must have male connectors on the top whereas for the opposite side the female connectors should be on the top. So they can be easily fitted into one another to make a perfect hoop.
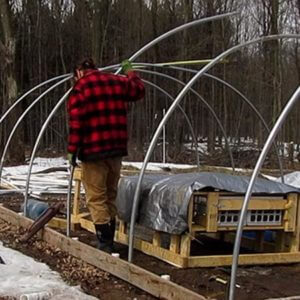
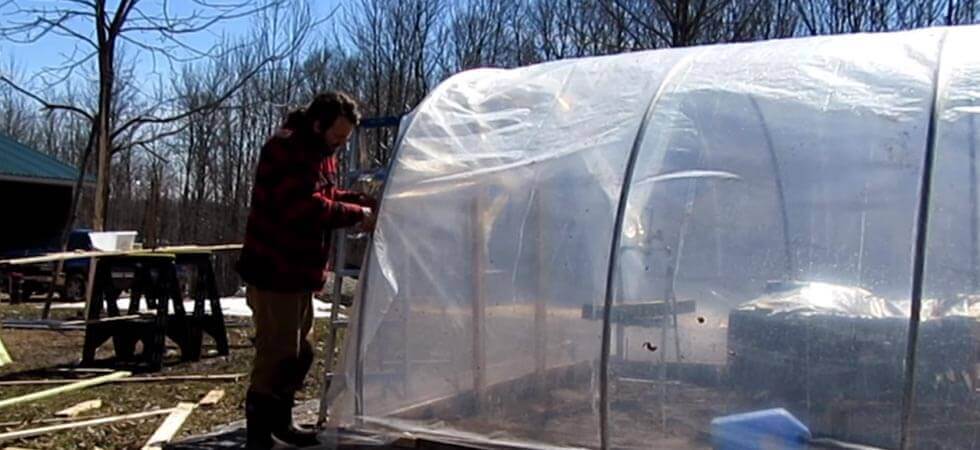
Connect the opposite poles on the top by inserting the male connector of one pole into the female of the other pole. Screw the PVC and the poles to the outer frame when all of the poles are inserted and adjusted accordingly to give the tunnel a perfect shape.
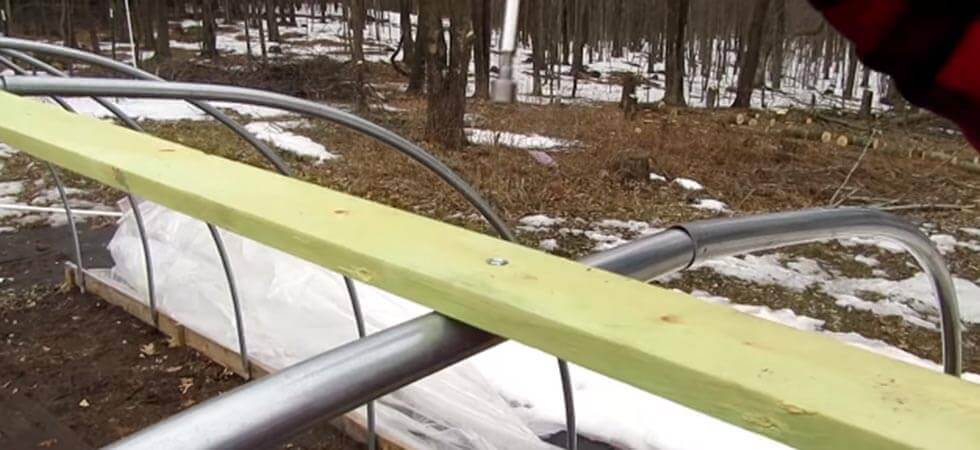
Take 1/4 wooden frame and connect it to all of the hoops together by screws. This will improve the strength of the hoop house and will make it bear strong winds.
Before screwing make sure to use a paddle bit and make a small hole in the wooden frame so that the screw would be completely inside the wooden surface and it will not come in contact with the plastic.
We hope that you are getting a ton of information from this article. We strongly recommend you to subscribe to our newsletter so you don’t miss out on our upcoming articles.
Let’s discuss how we can build a door for our DIY Hoop House.
Hold the wooden frame vertically upwards and then mark the positions for cutting the frame from above also mark the positions for the groove required for the head of the door. This hoop house height is above 6 feet.
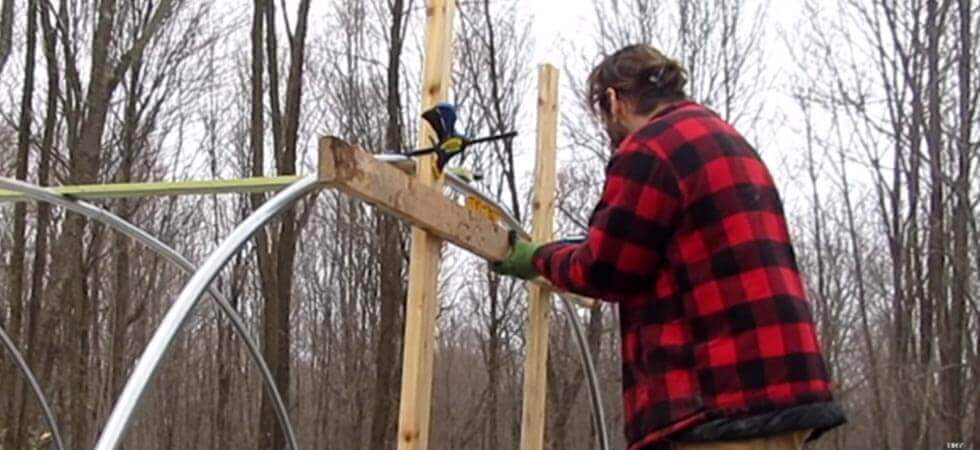
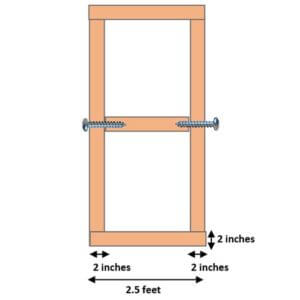
This hoop tunnel has a 2.5-feet wide door and the head of the door frame is shown in the Figure below. A 2/4 wooden frame is used for making the door head and its length is 8 inches + 2.5 feet. (2.5 feet is the inner dimension of the door).
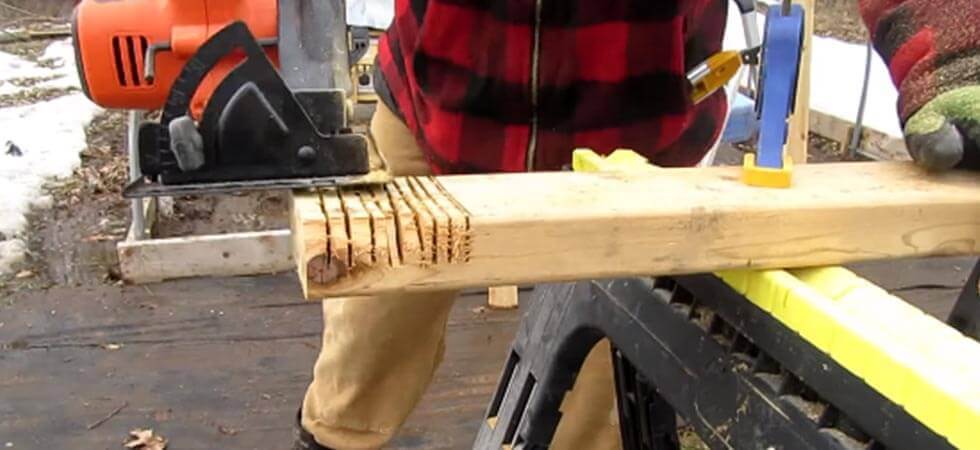
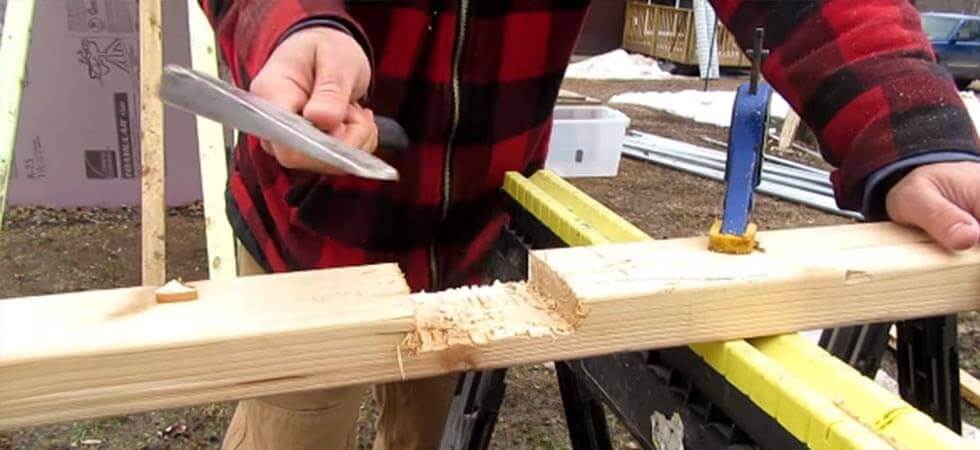
Cut 1 inch deep and 4 long grooves from each end of the frame so It will make a joint that can be easily connected to the door supports.
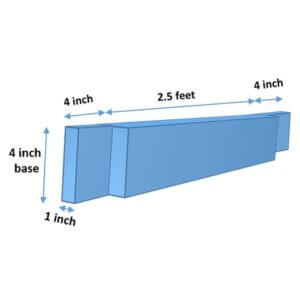
Cutting 1 inch deep and 4 inch long grove in the frame head of the door.
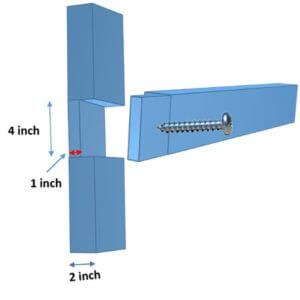
For the left and right door frames, make a groove in the frame around 4 inches long and 1 inch in depth. The door head frame will lock with the door side frame by these grooves and can be easily screwed from outside.
Fix the door head frame with the door ends using screws and also screw the lower end of the door side frames to the base wall of the hoop house.
Note: Your door side frames will be screwed to the base wall frame which will take some space on the inside, so don’t anchor your hoops exactly on the corners of the hoop house because then it will touch the door frame on the top. Anchor the end Hoop about 1-2 inches inside (Away from the corner) .
You will make the frames of the window using the exact same process. First, decide what size of widow do you want to built for your hoop house and then built them using the same procedure we have discussed above.
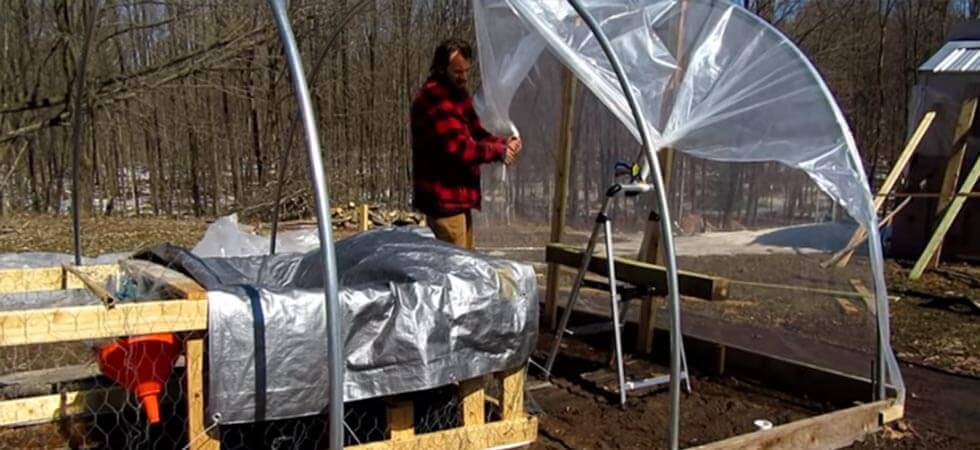
The next step is to cover the hoop house. Polythene plastic is used for covering up the hoop tunnel. I recommend you to by 20×40 plastic Film (See details).
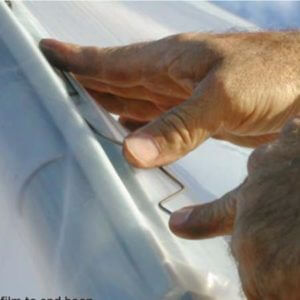
Notice: there is a hollow channel rod on the end loops. This channel is like a rail with a hollow inside. A zigzag wire is inserted in the space along with the plastic. This will hold the plastic tight.
I recommend using this rail because it will make the overall design much cleaner and it makes hoop house build simple. (check the wiggle wire and channel buying details here) Screw the channel rail on to the end hoops. Make sure that the channel rail is screwed in the middle of the hoop and the hollow part of the rail is facing perfectly upwards.
You might be wondering how does the plastic gets fixed to the rails. The rail which we have attached to the hoop has a hollow cavity. We Push the plastic tight above the rails and then use the wiggle wire to hold the plastic to the end hoop so In this way, the plastic keeps intact with the pole. And can easily resist strong winds. You can check this detailed article on How to anchor greenhouse plastic using wiggle wire for further details.
Tighten the side ends polyethylene plastic first. Use nails and wood strips to attach the plastic to the base wall of the hoop tunnel. Make sure the plastic has some tension and there are no bends in the plastic.
Please note that don’t fix the polyethylene plastic to the pole using wiggle wire at this point because the longer plastic along the length also needs to be fastened to the same wiggle wire. Keep the plastic tightened by clamping it to some support. I recommend folding the plastic at least twice when fixing it to the wooden base sidewall so the plastic will not tear easily.
Fasten the top plastic completely to the base frame of one end of the hoop house leave some plastic on both ends. It’s good to fold the plastic at least twice from the end and then fixing it to the bare wood.
Use the wiggle wire to fasten the side plastic and top plastic both at once to the end hoop. Make sure that the plastic is tightly fastened to the end hoop. Repeat the same process for the other end as well.
We are almost there 🙂
Use the wooden strips to fasten the plastic to the door frames. Now carefully cut the plastic which covers the door because it can be used for the doors.
For designing the door you can use the same 2/4 wood which u have used for the frames. we have used 2/2 wooden frames for making the door in this project. if you are using 2/2 wooden frames. take 4 pieces of wood (2 along the height of the door and 2 along the width cut them according to the required door dimensions then make 1-inch grooves in the wood from both ends of each of the pieces and screw them together for making a perfect rectangle.
For the center support, you can use a wooden frame and screw it to the ends of the door using large size nails. Attach the door to the door frame using hinges.
well done! you now have reached the end of our journey on “How to build a hoop house?“. We are sure now you can build a hoop house on your own. we have tried our best to give you complete information, to build a hoop house. although we are not experts and our hoop house is not that perfect but it’s not that bad as well 🙂
You can check all of the materials that we have used in this article “Materials Required For Building DIY HOOP HOUSE“

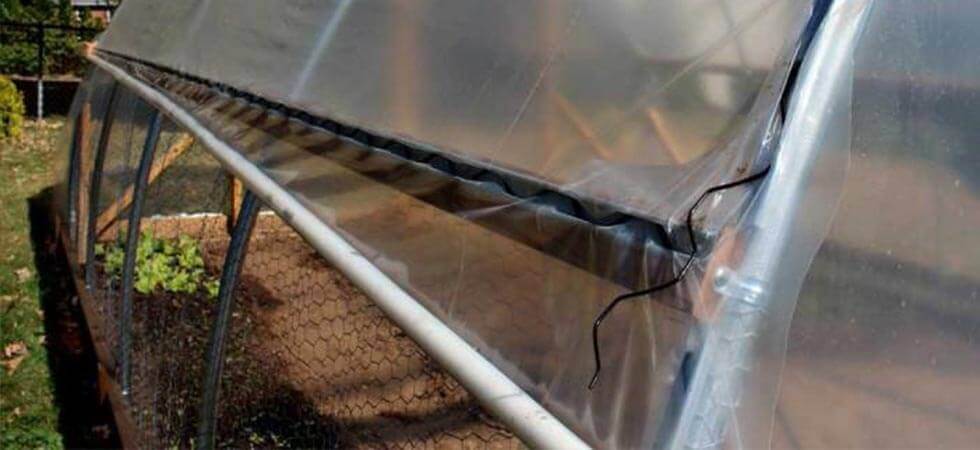
You can build a hoop house which is better and more advanced than our design. Our design has one drawback, that it has poor ventilation and it is most suitable for the cold and moderate weather. But during hot summers the temperature inside will get unsuitable to grow plants inside. A better approach is to provide side ventilation as shown in the figure given below. In this design, they have used a wooden strip and they have fastened this strip to the hoops. The aluminum is fixed to the wooden strip using screws. A wiggle wire holds the plastic from the side. The bottom end of the plastic is connected to a heavy pipe. For providing good ventilation during hot summers the pipes are folded upwards and during mild and cold weather the pipe is released downwards.
Special thanks to Nate for providing information and support in writing this post. Nate is a passionate farmer with a deep love for gardening. Nate has a channel on youtube with the name “Tiny Hilltop” where he shares his gardening stories and provides valuable gardening information.
We hope that you enjoyed this post if you have any questions or suggestions regarding this post just let us know. Actually, we have put a lot of effort into writing this article, we will love to hear your experience. We encourage you to share this post with your friends. we can save the following pin to your Pinterest account. We are waiting to hear from you 🙂
Comments are closed.
I’ve been browsing online more than 2 hours today,
yet I never found any interesting article like yours. It is pretty worth enough for me.
In my opinion, if all web owners and bloggers made good content as you did, the
web will be much more useful than ever before.
Thankyou for appriciating, It took me 12 days to write this article and i think its one of the best of the internet but unfortunately this article is not ranked on google
[…] If not dont worry, I have prepared a detailed article, full of valuable information and instructions which you can follow to make your own Greenhouse (Hoop House Actually) all by yourself. Here is the article “How to build a Hoop House – A complete Step by Step Guide“. […]
We are a gaggle of volunteers and starting a brand new scheme in our community.
Your web site offered us with helpful information to work on. You’ve performed a formidable
job and our entire group might be thankful to you.
[…] own a greenhouse yet then don’t worry, I have written a complete detailed article on “How to Build a Greenhouse” that will help you build your own […]
[…] backyard, then you can just build yourself a backyard greenhouse. You can also see this article “How to build a DIY greenhouse” for more details on building a DIY […]
[…] DIY Greenhouse […]
[…] In case, if you don’t own a greenhouse, we have a detailed and easy to follow article on “How to build a greenhouse” which will help you build your own greenhouse (make sure that when you are building your […]
Kindly indicate the construction details of a hoop house using PVC pipe and bomboo for framing considering the climatic conditions in Maharashtra,India.
Also please specify material for roof considering hot climate upto 46 degree Celsius,heavy rains,winds in this area.
Regards
Sure, I will answer these questions in my upcoming blogs